Store Layout / theme.liquid
文件說明
這是一個 SHOPLINE 主題的主要模板檔案 theme.liquid。 它定義了網站的基本結構,包括頭部(head)、主體(body)。

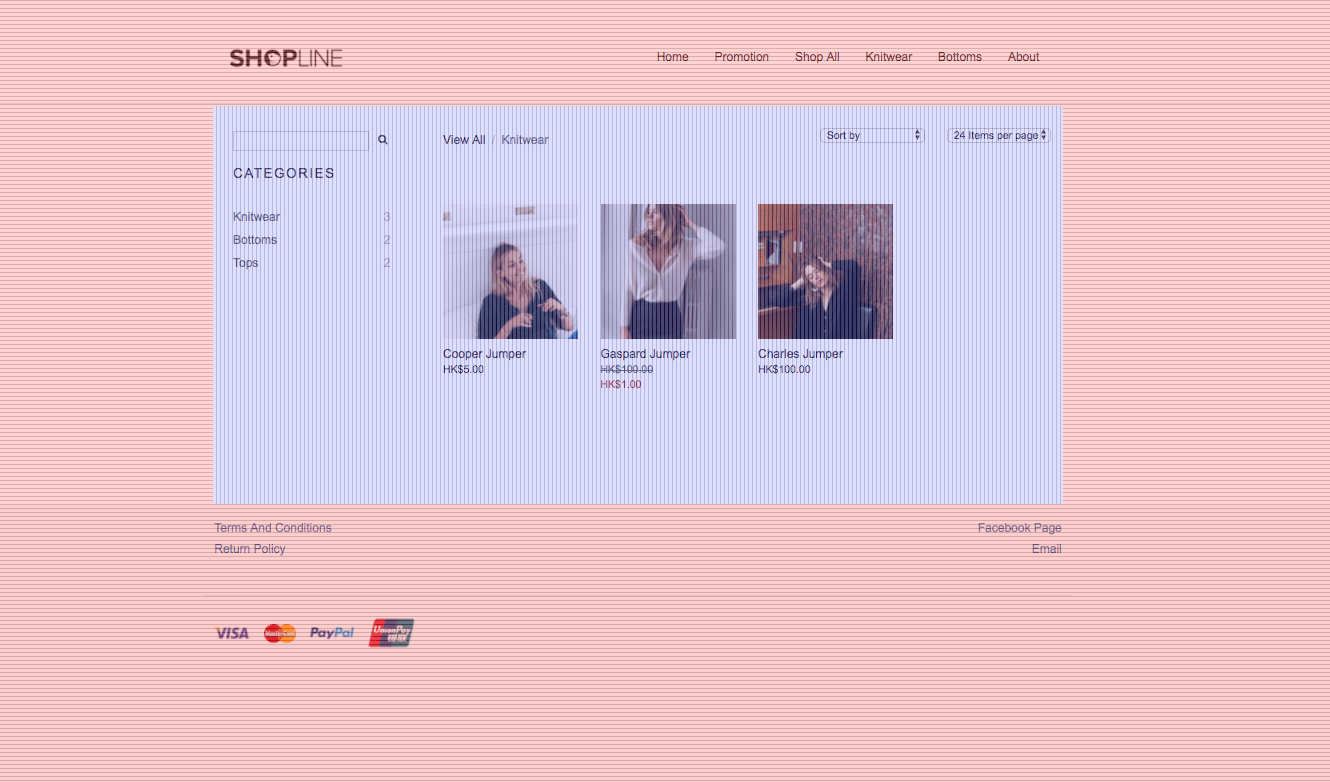
Layout (highlighted with horizontal pattern and red color overlay)
Content (highlighted with vertical pattern and blue color overlay)
內容
介紹文件內容部分
頭部(Head)
頭部包含了網站的元數據,如字元集、視口設定、標題、描述等。 這部分的內容通常在 layouts/head.liquid 檔案中定義。
{{ content_for_header }} 是 SHOPLINE 的內建對象,它包含了 SHOPLINE 需要在 <head> 標籤中插入的內容,如 Google Analytics 腳本、Facebook Pixel 腳本等。
{{ 'menu.js' | asset_source }} 是載入 menu.js 檔案的語句,menu.js 檔案應該在你的主題的 assets 資料夾中。
主體(Body)
主體部分是網站的主要內容。 這部分的內容會根據目前的頁面類型(如首頁、產品頁、部落格文章頁等)和具體的頁面內容而變化。
{% body { classes: 'mix-navigation-fixed' } %} 和 {% endbody %} 之間的部分就是主體內容。 這部分的內容通常包括導覽列、側邊欄、主要內容區域、頁腳等。
{% if page.identifier != 'express_checkout' %} 和{% if page.identifier != 'express_checkout' and page.identifier != 'checkout' %} 這兩個條件判斷用於排除特定的 頁面類型,如快速結帳頁(express_checkout)和結帳頁(checkout)。
{% render_announcement %}、{% render_header %} 和 {% render_footer %} 是渲染公告、頭部和尾部的語句。 這些部分的內容通常在其他的 Liquid 檔案中定義。
{% include 'navigation_bar_desktop.liquid' %}、{% include 'navigation_bar_mobile.liquid' %} 和 {% include 'footer.liquid' %} 是包含其他 Liquid 檔案的語句。 這些文件應該在你的主題的 snippets 資料夾中。
<div id="Content"> {{content_for_layout}} </div> 是主要內容區域。 {{content_for_layout}} 是 SHOPLINE 的內建對象,它包含了目前頁面的主要內容。
如何使用
你可以根據你的需要修改這個文件。 例如,你可以新增、刪除或修改元素,改變佈局,加入 CSS 類別或 ID,等等。 但是,請確保你不要刪除或修改 SHOPLINE 的內建對象,例如 {{ content_for_header }} 和 {{content_for_layout}},否則你的網站可能無法正常運作。
範例
<html lang="{{ shop.current_locale.code }}">
    <head>
        <!-- layouts/head.liquid -->
        {{ content_for_header }}
        {{ 'menu.js' | asset_source }}
    </head>

    {% body `{ classes: 'mix-navigation-fixed' }` %}
        <!-- 主體內容 -->
    {% endbody %}
</html>
提示
- 保持程式碼清晰:請確保你的程式碼易於閱讀和理解,避免使用複雜的邏輯或不必要的程式碼。
- 測試你的程式碼:在修改程式碼後,確保你的程式碼能夠正常運作,不會導致頁面無法顯示或顯示錯誤。
- 遵守 SHOPLINE 的規範:請遵守 SHOPLINE 的開發規範和最佳實踐,以確保你的程式碼能夠與 SHOPLINE 平台無縫整合。
若想為全站新增客製字體
步驟 1:至 店面級別設定,將 文字 內的 標題 與 內容 分別設定為 系統字體,避免網頁下載多餘檔案。
步驟 2:準備字型檔,並上傳至可公開存取的網址。
步驟 3:在 head 區域加入以下程式碼,並將程式碼內變數 custom_link_domain(字體位置域名), custom_link_href(字體位置連結), custom_font_name(字體名稱) 替換。
<link rel="preconnect" href="{{custom_font_link_domain}}" crossorigin>
<link rel="preload" as="font" type="font/woff2" href="{{custom_font_link_href}}" crossorigin>

<style>
  @font-face {
    font-family: '{{custom_font_name}}';
    src: url('{{custom_font_link_href}}') format('woff2');
    font-weight: 400;
    font-style: normal;
    font-display: swap;
  }

  :root {
    --font-title: '{{custom_font_name}}', var(--system-sans);
    --font-paragraph: '{{custom_font_name}}', var(--system-sans);
  }
</style>
主要項目:
@font-face:自訂字體註冊,建議提供 400 & 700 字重。
CSS Variables:設在 :root 層級,覆蓋原變數,並以我們提供的系統無襯線字體集合 var(--system-sans) 作為回退。
以下為選填項目,但建議加入以優化網頁載入:
preconnect link:先連線字體來源主機,優化首次載入延遲。請只填入域名(domain),不含路徑(path)。
preload link:預先告訴瀏覽器要載入的字體,幫助首屏渲染。請填入完整字體位置。
Updated 8 months ago
